How you manage and assign users roles is crucial because it affects the level of access your team has to make changes and complete actions in the system.
The last thing you want to do is give users access to features they haven’t been properly trained in or assets and data they could accidentally change, causing issues throughout the whole system and extra legwork for you.
What are the levels of users in Pardot?
There are four default user roles in Pardot: Administrator, Marketing, Sales Manager, and Sales. These default roles cannot be edited and are intended to provide you with the typical access level requirements for the different functions i.e. marketing users versus sales users.
Administrator - the highest level of access. Any user with this role has access to all settings, prospect data management functionality, and modules. Only Admins can create or edit user roles and are the ones taking care of usage limits, integrations, and domain management.
Marketing - have the ability to manage most prospect data and any marketing modules i.e. creating Automation Rules, landing pages, lists, forms, email templates. They can send list emails but have some restrictions when it comes to sending operational emails.
Sales Manager - cannot access marketing modules but does have access to prospect data, as well as being able to send one-to-one emails to prospects. They cannot send list emails. Given sales and marketing need to align on lead generation activities, Sales Managers can view most marketing reports but with restricted access and can export prospect data to better see the types of prospects coming into the system, which helps with discussions around quality, scoring, and grading.
Sales - arguably the most limited user role in Pardot, it’s pretty much ‘read-only’ and only provides essential need-to-know access. Sales users can only access prospect management features such as being able to view, edit, and export any prospects assigned to them (not the entire database). Like Sales Managers, they can send one-to-one emails but not list emails.
There’s a full breakdown of the exact modules each default user role has access to on the Salesforce support site.
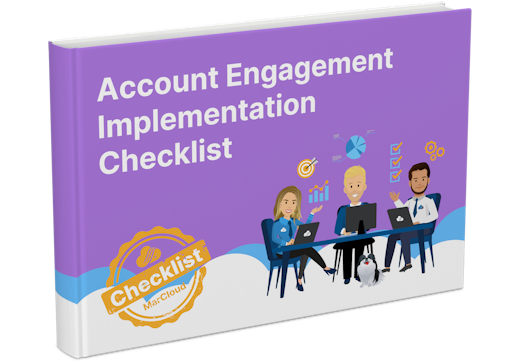
Free Implementation Checklist
Set yourself up for marketing automation success with this step-by-step checklist for implementing Account Engagement (aka Pardot).
- Technical setup
- Marketing insights
- Integrating with Sales Cloud
- Syncing prospect data
- Scoring & grading
- Lead assignment

Why create a custom user role?
The out-of-the-box user roles in Pardot may suit you fine but in many cases, you may need to tweak the permissions for specific roles.
For example, you might like your Sales users to have access to the Marketing Calendar on their dashboard, purely for information purposes.
Within the default user roles, only Administrators can send operational emails in Pardot but you may trust Marketing users in your team with this responsibility and therefore, you’ll need a custom user role to allow permissions.
Likewise, you may have different seniority levels in your marketing team and need to restrict permissions based on this; preventing junior members from creating or editing email templates but ensuring senior team members have the ability to do so.
In short, creating custom user roles in Pardot gives you the power to give and remove permissions that are tailored to your business structure and needs.
How to create custom user roles in Pardot
Custom user roles are only available in Advanced editions, or Plus editions with an additional fee.
There are two options: start from scratch or simply clone a default user role and modify it as needed.
If you just need to edit a couple of permissions and the user roles will therefore remain largely unchanged, the latter is probably the fastest and easiest way.
If, however, you want to fully customise new user roles for your team members, you can create them from scratch. Naturally, only Administrators can create custom roles.
To create one, follow these steps:
Go to Admin > User Management > Roles (in Lightning App this is under Settings).
Select ‘Add Custom Role’.
Name your new role - keep it simple and intuitive.
Select the permissions you want to grant.
Hit ‘Save’.
To copy a user role, whether it’s a default or a custom role you’ve created, navigate to User Roles and select ‘Copy’ next to the role you want to duplicate. Follow the same process of naming, editing the permissions, and saving the changes.
Once your roles have been created, you can start creating or assigning roles to your users. You can do this individually or by importing users in bulk.
You might come up against challenges with managing users across Pardot and Salesforce, or within multiple Business Units. Here are a few blogs we’ve already written about those:
How to Set Up Pardot Users: Identity Licenses, Pardot SSO, User Sync and Business Units
Salesforce User Sync & Identity License Mapping: What to Expect
Feeling stuck with user management? Our team of certified specialists implement Salesforce software and manage user roles in Pardot (Account Engagement) frequently, so we know exactly what needs to be done and in what order. Contact us for a friendly chat.

Tom Ryan
Founder & CEO of MarCloud, Tom has been on both sides of the fence, client-side and agency, working with Salesforce platforms for the best part of a decade. He's a Salesforce Marketing Champion and certified consultant who loves to co-host webinars and pen original guides and articles. A regular contributor to online business and marketing publications, he's passionate about marketing automation and, along with the team, is rapidly making MarCloud the go-to place for Marketing Cloud and Salesforce expertise. He unapologetically uses the terms Pardot, Account Engagement and MCAE interchangeably.
More by Tom RyanFeatured resource

Pardot Implementation Checklist
Starting out with Marketing Cloud Account Engagement, formerly known as Pardot, is no easy feat. Set yourself up for marketing automation success with this step-by-step checklist for implementing Account Engagement (aka Pardot). Work through the stages and get in touch if you need support!
Download now


