This blog was written before Pardot was renamed to Marketing Cloud Account Engagement. You can read more about the name change and what it means here.
As a business, your email database is quite possibly your most valuable asset. It’s what allows you to keep in direct contact with your customers and deliver content that is tailored just for them. It, therefore, goes without saying that you want to retain as much of your database as possible, which is why we would strongly advise that you implement two-click unsubscribe for your Pardot email campaigns.
Why Your Pardot Unsubscribe Should Be Two-Click:
Two-click unsubscribe vs one-click unsubscribe
Two-click unsubscribe is basically a two-phase unsubscription process where an email recipient will be asked to confirm that they want to remove themselves from an email list. This is also known as confirmed unsubscribe’.
Contrastingly, one-click unsubscribe is where the recipient is instantly unsubscribed upon clicking the unsubscribe’ link in the email. By default, your Pardot emails will contain this link.
Why you should implement two-click unsubscribe
The most important reason for implementing this model is the fact that the two-click process avoids recipients from being unsubscribed without their knowledge.
Many spam filters today will crawl through an email and click on every link to ensure that there are no viruses or other nasties hidden in the email. Unfortunately, if you are sending emails that contain a one-click unsubscribe link, then these recipients will be instantly removed from your mailable lists.
Another reason you should be using two-click unsubscribe is that it can actually prevent some recipients from unsubscribing entirely. If your email’s unsubscribe’ link forwards to a Preference page, then you can give the recipient a choice as to which lists they would like to remain a part of.
Since some of your customers may only want to receive updates on specific things within your business, such as product/service updates, this is a good option to have in order to retain as much of your mailable database as possible.
Why you need an option to unsubscribe
You might think that an easy way to prevent recipients from unsubscribing would be to simply remove the option from your emails altogether and have the preference page on your website instead. However, to comply with CAN-SPAM regulations, all emails must contain a link to either an email preference or unsubscribe page.
How to configure two-click unsubscribe
There are two ways to configure a two-step email unsubscribe process in Pardot. The first solution is new to the Spring 2021 release of Pardot, and is a good quick fix. The second is preferable for companies that would like more flexibility when configuring email preferences.
Solution 1: Enable Two-Click Unsubscribe on your Unsubscribe page
1. In Pardot, head to Marketing > Emails > Unsubscribe Page
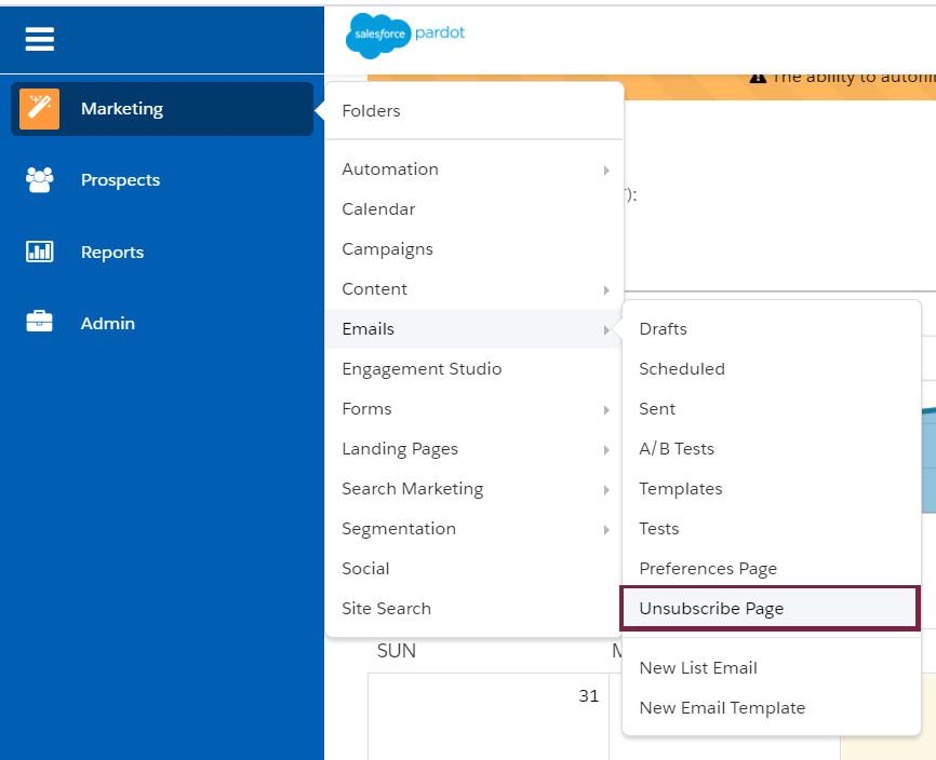
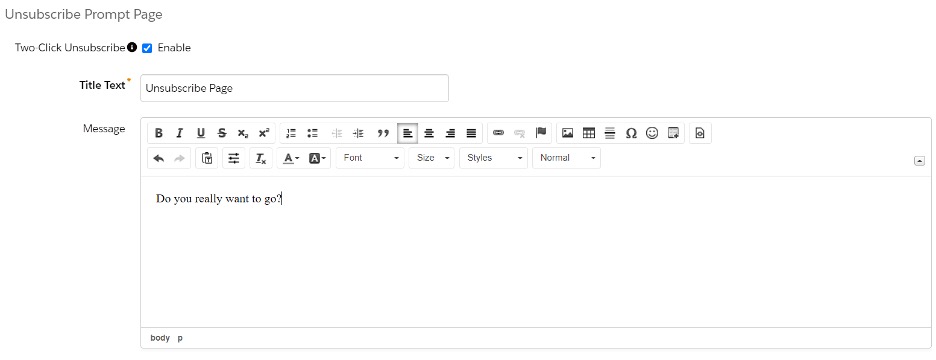
2. Click Edit’ in the top right-hand corner, and then enable the checkbox on Two-Click Unsubscribe’.
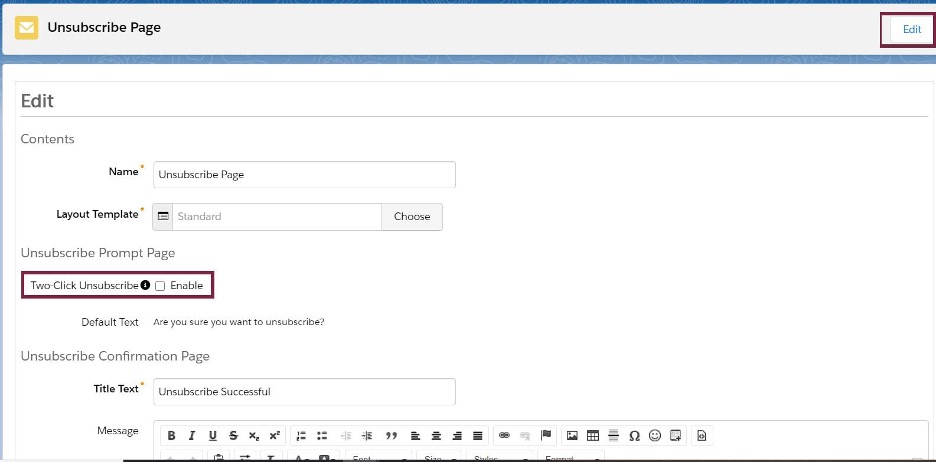
3. Enter the title and message that you would like to display on the second phase of the unsubscribe process.
4. Press Save’.
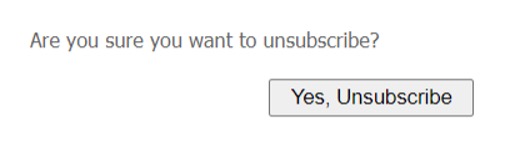
5. Click on the link to preview, and it should now show like this:
Solution 2: Use a Preferences Page to manage subscriptions
For this solution, we first need to set up some public dynamic lists to display on our preferences page. Luckily, my colleague Laura has already created a fantastic blog on using dynamic lists on your Pardot Preference Page. Once you have this all set up, you can continue onto the following steps.
1. In Pardot, head to Marketing > Emails > Preferences Page

2. Select the Preference Page that you would like to use, and then click Edit’ in the top right hand corner. You can now edit the form’ and thank you’ content that will display on your Preferences Page.
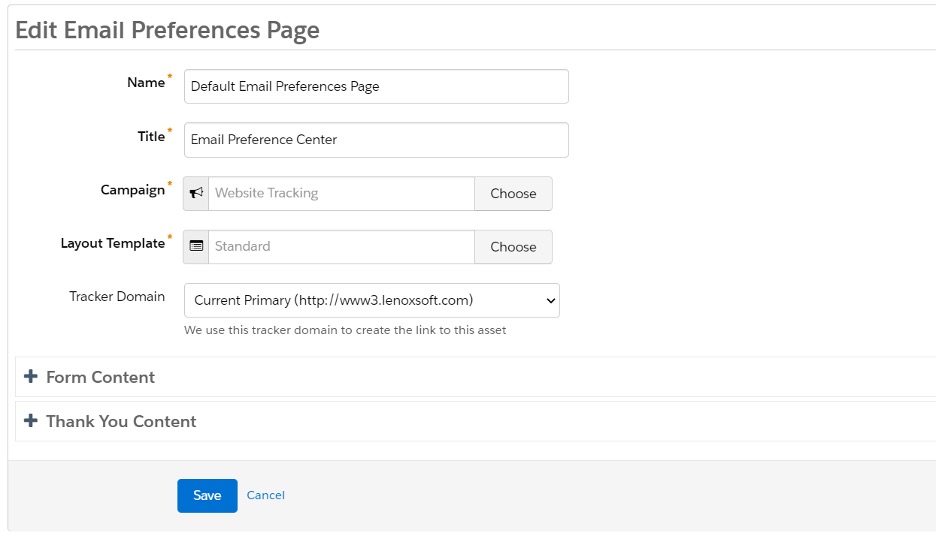
3. Press Save’.
4. Click the link to preview your Preferences Page. You should be able to see all your public lists in the preview, but email recipients will only be able to see dynamic lists that they are already a part of.
And that’s it! With your Pardot unsubscribe process strategically set up, you can feel more confident that prospects will stay in your mailing list and better engaged with your content. If during the process you need support, the MarCloud team is here to help.