This blog has been updated with instructions for form submission tracking in GA4.
Pardot forms are embedded into web pages using iframes, which stands for ‘inline frames’. In a nutshell, this means the Pardot page containing the form, is embedded into a frame on the web page of our site. One of the biggest hurdles this creates, is a struggle to set up Pardot form tracking in Google Analytics (GA4).
In 2022, Pardot was renamed to Marketing Cloud Account Engagement, but we’ll still refer to it as Pardot in this blog post for simplicity and SEO reasons!
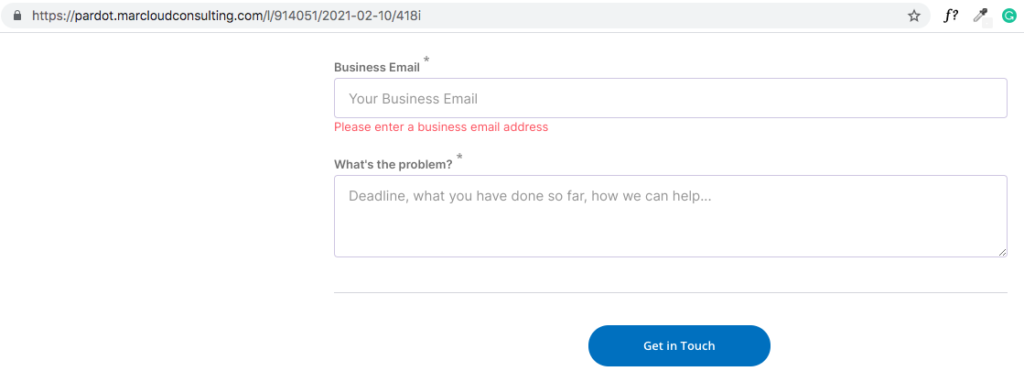
Pardot form embedded using iframe on marcloudconsulting.com

Pardot form web page on pardot.marcloudconsulting.com
Because the form does not exist in the actual page source code, standard ‘Event’ tracking on form submissions will not work by default.
It’s one of the biggest challenges our clients face and one that’s quite technical and can be tricky to resolve!
After much trial and tribulation, at MarCloud we’ve been able to implement a Pardot form tracking system that works and can be replicated by other users. It uses Google Tag Manager, so if you don’t have a GTM account yet, the first step is to create one for free and install it on your website.
Before we dive into the next steps, let’s consider why we need to track these forms in the first place.

Pardot form tracking using GTM & GA4
Why track Pardot forms in Google Analytics?
In Pardot we have access to the number of views a form receives, the leads that submit the form, the form conversion rate, and the initial lead source for our prospects. For some marketers, these metrics may be enough because they give us the insights needed to demonstrate lead generation performance.
But there’s a reason we use Google Analytics in conjunction with Pardot.
Google Analytics and GA4 specifically, tells us more about our website performance, audience, and overall conversion rate - both as a whole and from particular marketing activities or channels.
Even with an excellent Pardot setup, Google Analytics is a vital tool for improving the user experience of our site, and forms are part of this experience.
The true magic is in using GA4 and Pardot in tandem, to track website traffic and behaviour and Pardot form and lead generation performance.
Not only this, having Pardot form tracking set up correctly within Google Analytics means we can track conversions more easily from advertising campaigns such as Google Ads or LinkedIn, and actually optimise our activity using conversion data.
So, how do we do this?
How to set up Pardot form tracking using GTM
To track the submissions of forms within an iframe, the website that hosts the form (your Pardot domain) and the website that the form is embedded in need to communicate with eachother.
To do this, the Pardot form needs to send out a message to the main website website that is has been completed, and the main website needs to listen out for that message.
The good news is, the ease of event tracking in GA4 makes it much easier to track Pardot forms, with just six steps.
Step 1: Pardot Form Template Code
First, in the Pardot form layout template’s ‘Form’ tab, amend the ‘thank you’ section to the following:
It should look like this (be wary of punctuation when you copy and paste):
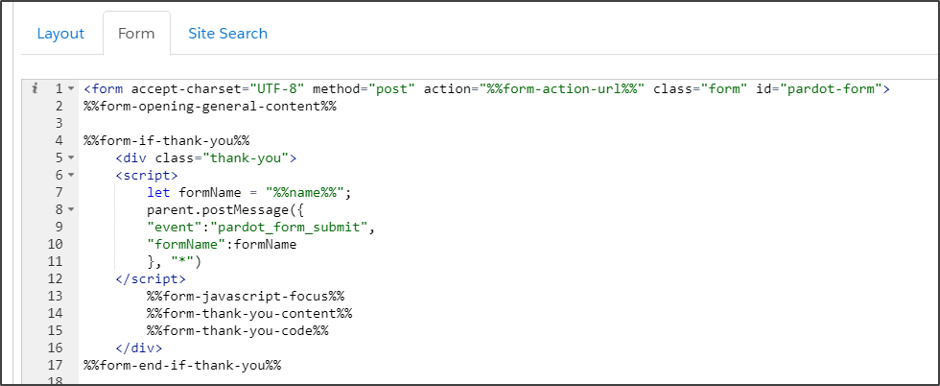
What this code does is fire a postMessage to the form’s parent window (the window above the iframe, essentially) upon the form’s completion. This postMessage contains an event name of ‘pardot_form_submit’ and a formName variable, which will dynamically capture the name of the form.
If you’d prefer to use a different event name, change it here and wherever you see it in the instructions below.
Once this is done, open Google Tag Manager and head to your website container.
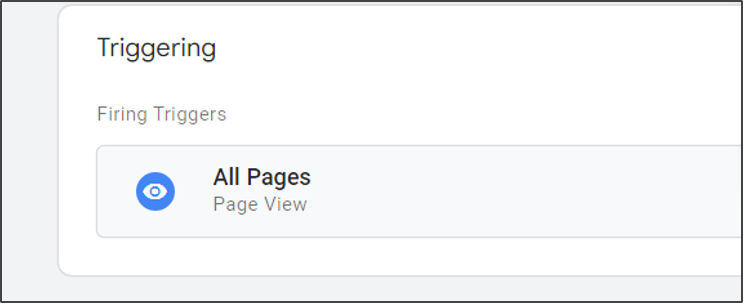
Step 2: PostMessage Event Listener Tag
In Google Tag Manager, create a ‘Tag’ with the tag type ‘Custom HTML’ and enter the following script:
Set the tag to fire on all page views and name your Tag ‘Pardot Form Listener’.
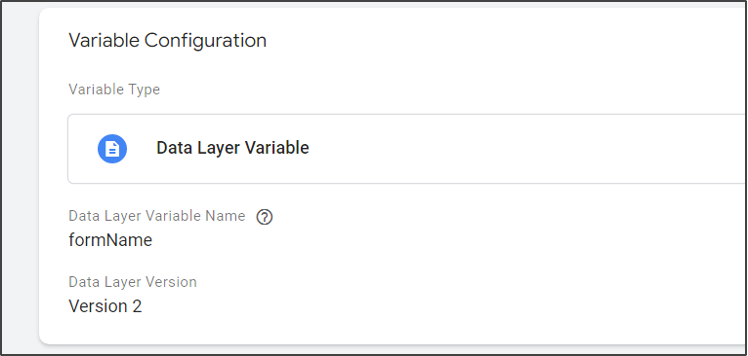
Step 3: Create a custom formName Data Layer variable
Still within Google Tag Manager:
- Navigate to ‘Variables’ in the left-hand menu.
- Scroll down to ‘User-Defined Variables’ and click ‘New’.
- Select the ‘Variable Configuration’ box and choose ‘Data Layer Variable’.
- Enter the Data Layer Variable Name as ‘formName’.
- Name the Variable as ‘Pardot Form Name Variable’ and hit ‘Save’.
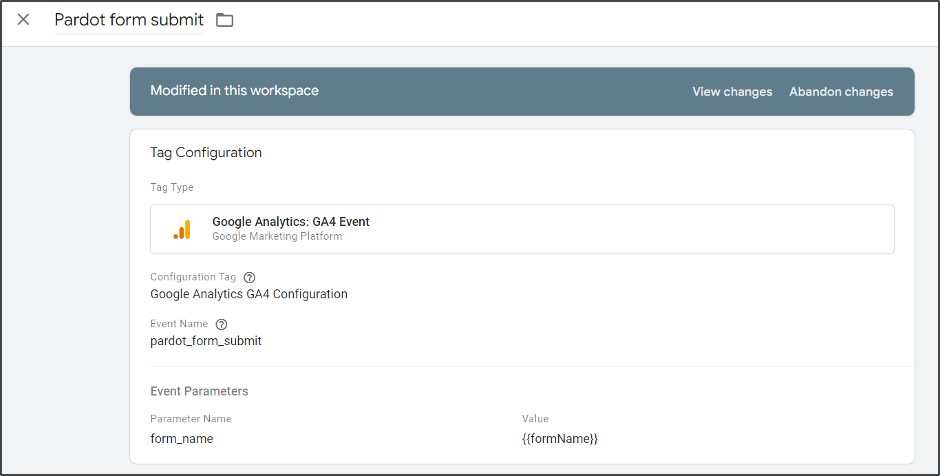
Step 4: Create a Pardot form submission event
Create a new Tag of type ‘Google Analytics: GA4 Event’.
The Event Name should be ‘pardot_form_submit’ (this matches the event name used in the Listener code within your Pardot form template), and you need to add an event parameter of ‘form_name’ with the value being the new formName variable you just created.
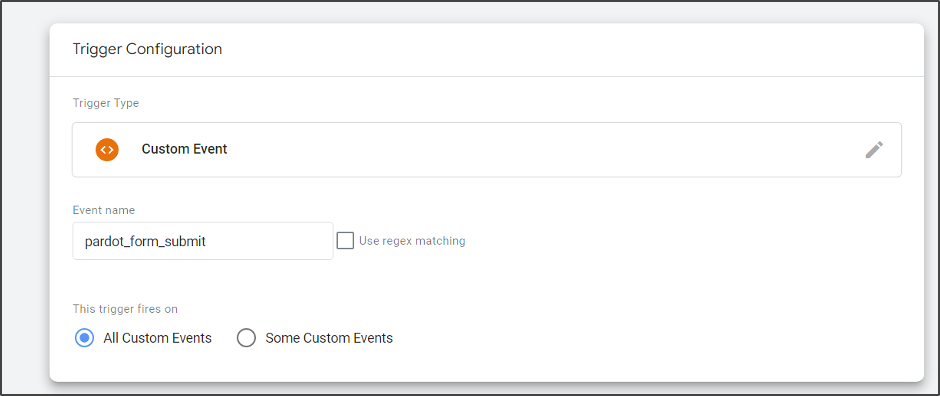
The trigger should be ‘Custom Event’, with the Event name ‘pardot_form_submit’, set to fire on ‘All Custom Events’.
Now, save all your Google Tag Manager changes using the blue ‘Submit’ button in the top-right.
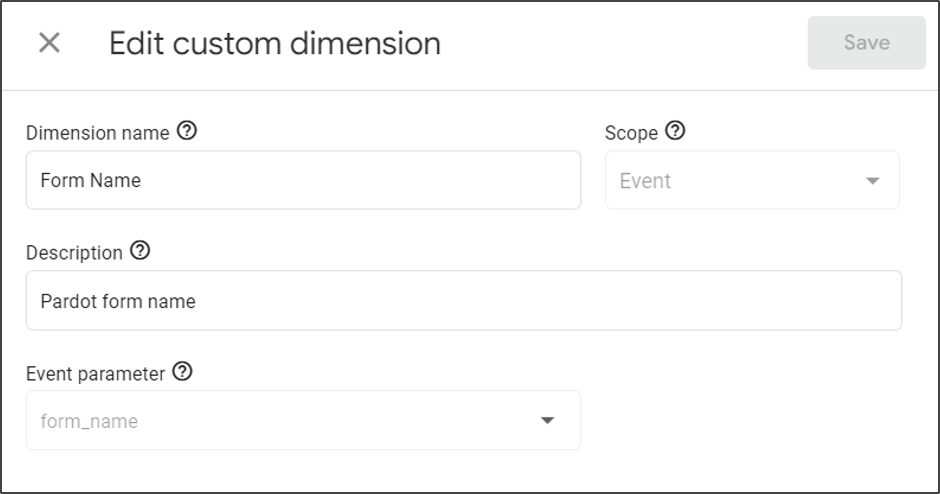
Step 5: Create a custom dimension in GA4
Now that the form tracking setup is done in GTM, you should start to see data pulling into GA4. You can check this in the ‘Events’ section of your GA4 property, via the Admin settings. This is also the place to mark your events as ‘Conversions’, which you’ll likely want to do for form submissions.
However, because we have set up custom events that measure non-standard Dimensions, we need to create these, too. In case you’re new to GA4 terminology, ‘Dimensions’ means the attributes or characteristics we want to track. In this case, we want to track individual forms, not just a single event for all forms and non-standard Dimensions is how we do this.
So, head to Google Analytics and select your GA4 account. Now go to Admin > Custom definitions > Create custom dimensions. Enter the following details in the fields provided:
Dimension name = Form Name
Scope = Event
Description = Pardot form name
Event parameter = form_name
It should look like this:
Hit ‘Save’. Event details will now begin to populate on the ‘Realtime’ events tab under ‘Reports’, as you receive form submissions. You can test this by submitting forms in a separate tab and viewing the Realtime tab, or by navigating to ‘Admin’ and ‘DebugView’.
NB: Remember that if you have excluded your IP from GA4 tracking, your activity will not show in the Realtime section!
If you would like to see parameters for all events historically, you will need to create a custom exploration and don’t worry, I’m going to show you how to do that too.
Step 6: Create a custom exploration in GA4
In GA4, head to the ‘Explore’ tab on the left-hand menu.
- Click on ‘+Blank’ to start a new exploration.
- On the ‘Variables’ tab, click the ‘+’ symbol to add the following details by ‘Import’:
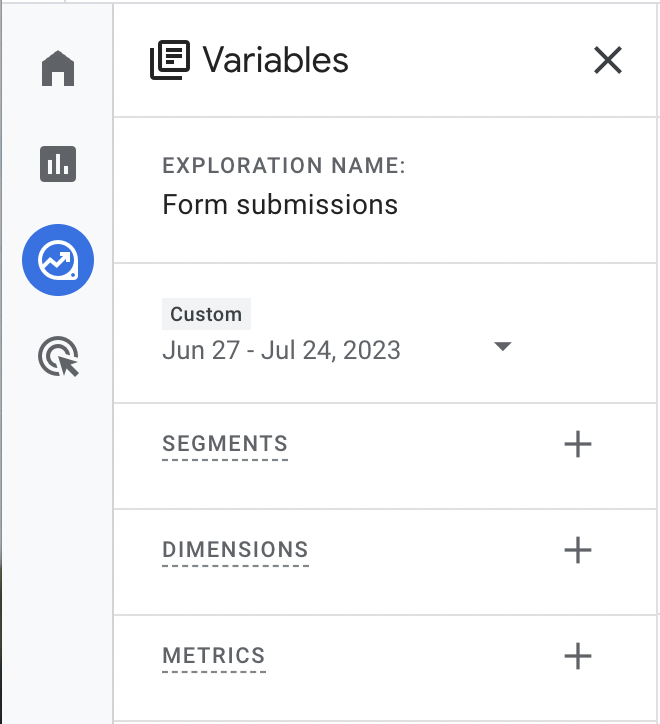
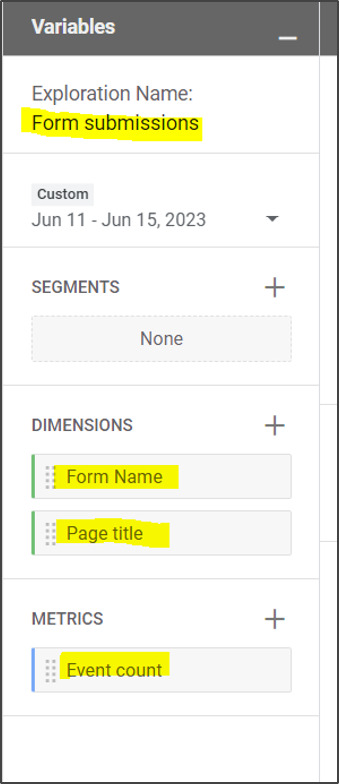
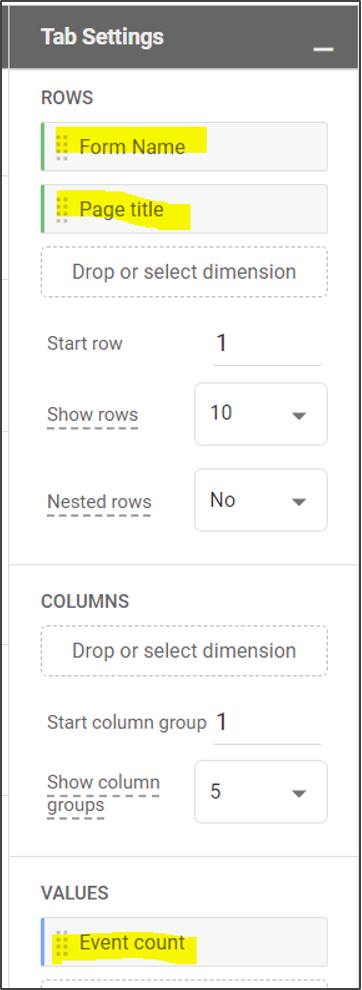
- On the ‘Settings’ tab, enter the following highlighted rows and values:
The report should look a little something like this:
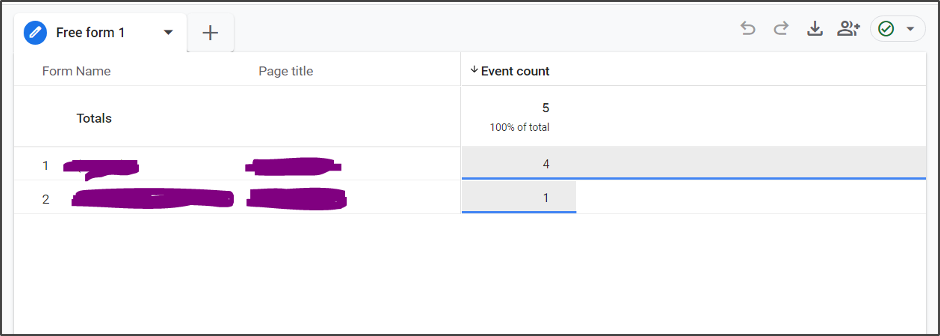
Your exploration report will autosave, so you can jump into it at any time.
Congrats! You have now successfully set up Pardot form tracking in Google Analytics (GA4), using Google Tag Manager. We appreciate this guide is pretty technical and may be overwhelming at first (code = scary for many!) but with a bit of practice, any marketer can pick it up.
If you do get stuck when setting up your form tracking in Google Analytics, or with any other aspect of Pardot or Marketing Cloud, send a message to the MarCloud team and we’ll do our best to help get it sorted.