Pardot Email Marketing With the Drag-and-Drop Email Builder
As of the 17th of October, we can now access the new drag-and-drop email builder in Pardot Lightning. This is an exciting new update for Pardot email marketing that the team at MarCloud Consulting have loved exploring.
This blog was written before Pardot was renamed to Marketing Cloud Account Engagement. You can read more about the name change and what it means here.
As of the 17th of October, we can now access the new drag-and-drop email builder in Pardot Lightning. This is an exciting new update for Pardot email marketing that the team at MarCloud Consulting have loved exploring.
If you have experienced frustration with Pardot email building, testing and sending, this may be the answer.
First, we need to ensure that our Domain supports Content Delivery Network (CDN) as we will be sending emails out of Pardot Lightning in Salesforce.
We could create a new domain or use an existing domain which has the following criteria:
Verified in Salesforce
Configured to serve content via the Salesforce CMS CDN.
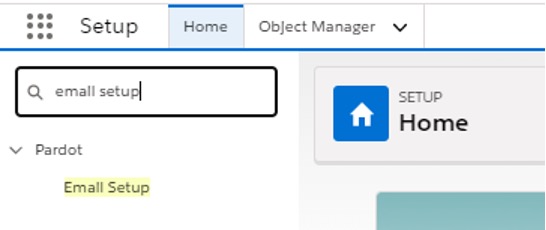
To manage this, head to the Home menu in Salesforce Setup and search for email setup’, which will be located under Pardot (see below):
Content Management System (CMS) Visibility
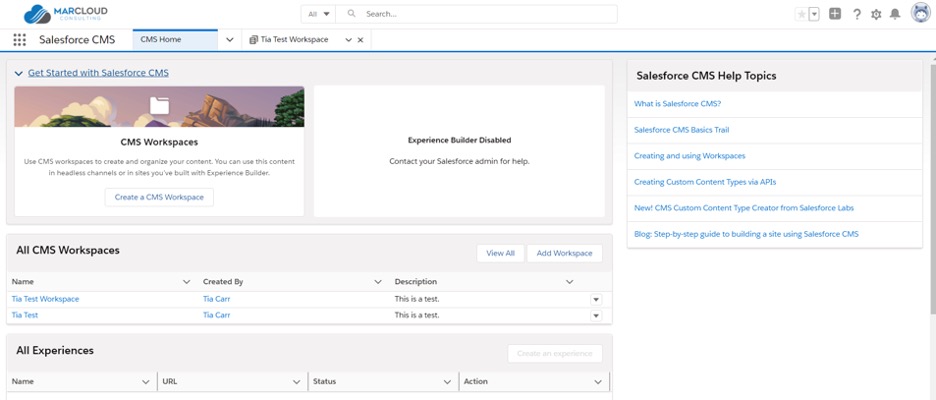
One of the prerequisites I listed previously included the use of Salesforce CMS, this will be used to store and access content uploaded into Salesforce, situating all marketing content into one place.
In short, the CMS is your go-to for every single piece of content you will add into your emails and it's really easy to access as it's a Lightning experience app. But, it’s best not to think of it as an app’. The CMS can be accessed from multiple points in the whole Salesforce user interface, including the new email builder.
Eventually, Pardot and Salesforce will unite to work as a single instance, meaning marketing content will be stored in the CMS for easy access across Marketing and Sales users.
Select a Channel
From the email setup, we can now select the channel that we created in the previous step (in the CMS).
The channel that is chosen will host specific content available for email templates and content.
Note: We can change the channel at any time, however, the content available in the Drag-and-Drop Editor is only linked to one channel at a time. If we choose to change the channel images in sent or scheduled emails will not be affected but future content will be linked to the new channel selected.
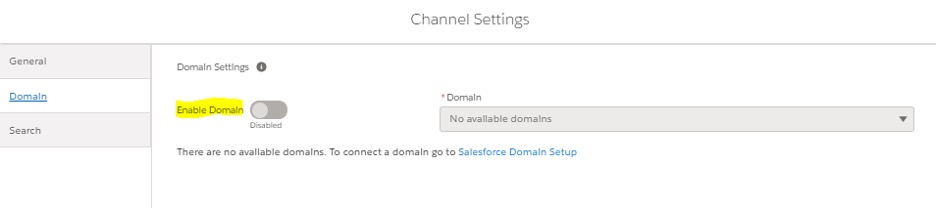
The final step in setting up the File Hosting stage is to head to the CMS channel, go to the dropdown menu, click edit and choose the CDN supported domain in domain settings’ and enable this.
After these steps are complete, we have access to the CMS for image sharing for our emails and a domain to send from.
This app is pre-enabled in Salesforce, however, if you are having trouble seeing the tabs, you’ll need to ensure the tab visibility has been changed to “Default On” in the Setup settings.
Note: To use the new email builder, we must have a CMS Workspace and Channel created and any team member must be added as a “Contributor” for the channel (this will give them access to the content uploaded there).
Users need to have the correct permission set to enable them to manage emails and add CMS files to email content.
The first stage is to set a permission set in Salesforce. Navigate to Setup > User Access and select “Create Permission Set”.
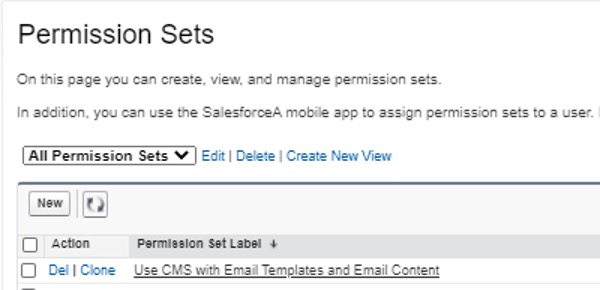
To enable this permission set, we simply click the button and Salesforce has created a premade set labelled “Use CMS with Email Templates and Email Content” with two permissions automatically enabled:
“Access to the drag-and-drop email builder”
“Manage email content”.
Manage Permissions
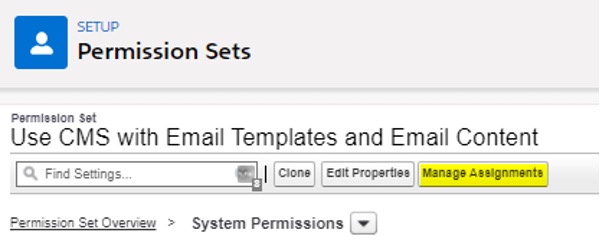
After this has been selected, we can manage the permissions by selecting the Use CMS with Email Templates and Email Content’ permission set and selecting the “Manage Assignments” option.
This simply means adding the users we would like to have these permissions as enabled e.g. Marketing Users. Select the users that will have access to this feature and click save.
Now, the setup steps are out of the way we can focus on what you came here for… what this feature allows you to do for your Pardot email marketing!
Design Functionalities
As the name suggests, the new drag-and-drop email builder has been created with design functionalities in mind for the non-developer user. With this in mind, I have detailed some of my favourite new additions.
Undo button
One of the most underrated new additions with email builder is the “Undo Button”, a simple yet, much appreciated feature!
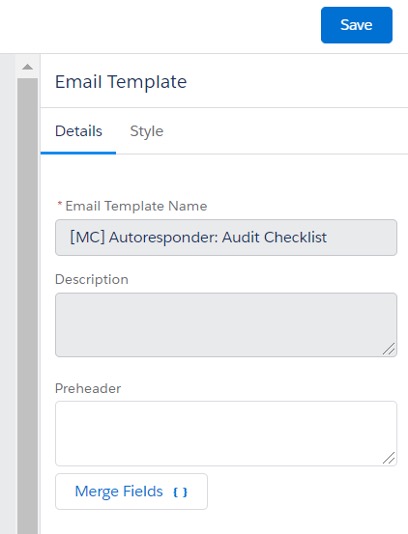
Preheader
We are now able to enter the preheader text as a standard field when editing an email template in Pardot Lightning. Again, this simple yet effective upgrade allows us to view and amend without modifying HTML code!
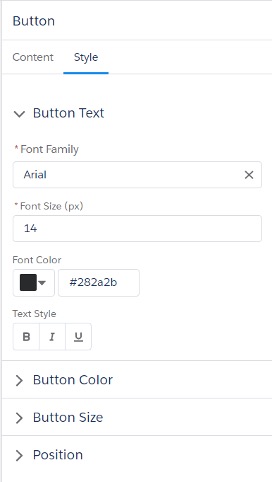
Buttons!
Not only can we drag and drop a button onto an email template, but we are able to customise it without HTML! This exciting feature allows users to change the formatting of the button with ease to represent your brand accurately.
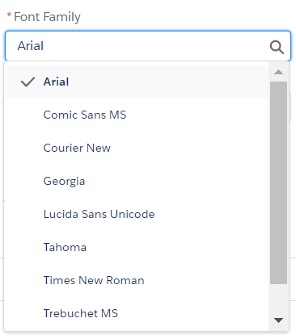
It is key to note that despite the new formatting accessibility, there are only a limited number of fonts to choose from, and if you (like us) have a favourite font, you may need to use HTML to change this.
“Locking” functionality
This is a particularly useful feature allowing the user to optionally lock certain components in place on the email template. By doing so, the locked components will remain uneditable when that specific template is selected for a list email.
We suggest this feature should be utilised for headers and footers we don’t want to be changed, for example, the links to privacy policies, company logo and preference centres.
Responsive Design & Preview
One of my favourite aspects of this feature is the fact that every template created is automatically responsive to any device it's viewed on. This fits in nicely with another additional feature that the new builder provides: mobile vs. desktop preview.
With this new feature - no HTML experience is needed! AND, just to make things a little easier for the users, we now have the ability and flexibility to view and alter components in either the “Desktop” or “Mobile” view, without having to worry about rendering tests!
Content Management System (CMS) Capabilities
The CMS is an essential part of the new Email Builder because this is where Pardot users will store all content for building emails! As Salesforce CMS will be fully integrated and embedded into the Salesforce user experience, this puts an end to the pesky workarounds and limited storage Pardot users have struggled with!
The new CMS is a great new addition, it's fast, flexible and allows for even more control over how and where content is presented.
If you have not used CMS before, you must have a workspace and channel set up to use images in the new email builder. For more information on how to set up a workspace & channel, please click here.
Alternatively, if you already have used CMS and have a workspace and channel created, just click Select Channel located under File Hosting on the Pardot Email Setup page to continue.
If you need help enabling this feature, please reach out to the team here at MarCloud Consulting.
Handlebars Merge Language (HML)
As one of the prerequisites, HML is essential for email compatibility over the Salesforce and Pardot platforms.
As the new drag-and-drop email builder is exclusive to the Pardot Lightning App in Salesforce, users are now able to search for and insert relevant data from using the integrated Merge Field’ button for tailored and concise email sends.
If you haven’t already upgraded from Pardot Merge Language (PML) to HML, this is not only an essential step in order to use the new drag-and-drop email builder, but beneficial for Pardot users in general.
Need more support? Our on-demand training pitstop 4 ‘The life of an email marketer' covers everything an email marketer needs to know when navigating Marketing Cloud Account Engagement (Pardot), from file and template storage to compliance, and practical use of the drag-and-drop builder.
Share
Hollie Fitzpatrick
Hollie joined the MarCloud team with extensive B2B marketing experience. With a keen interest in marketing technologies, they strive to find the best solution to increase the efficiency and quality of marketing campaigns through rigorous testing and data analysis. A certified Pardot consultant, Hollie spends her days at MarCloud being fully solutions-focused.
If you find the process of planning, creating, and sending emails in Pardot overwhelming or too time-consuming, this ebook is for you because understanding everything you need to know and do to ensure successful and effective email marketing activity is no easy feat.
There’s a trend in the conversations we’re having with marketing leaders these days. Teams that have been using Salesforce Account Engagement (Pardot) or Marketing Cloud Engagement for years are looking at alternatives, and this typically leads them to two options. Either they stay within the Salesforce ecosystem by moving to Marketing Cloud Next (one of Salesforce’s ‘on core’ marketing platforms), or they switch to HubSpot.
If you've been using Marketing Cloud Account Engagement (Pardot) for a few years, you'll know the product roadmap has stayed very, very still. Feature requests from years ago haven't arrived, leaving workarounds as permanent fixtures. Many marketers feel as though the platform they invested in isn't keeping up with what teams need it to do.
Most leaders reviewing marketing performance in HubSpot will eventually find themselves asking whether the data tells the full story. Even if you’re successfully tracking form submissions, original source, campaign associations, and revenue attribution, there are moments when you wish you had just a little more context around how that contact arrived in the system and what influenced them. This is where HubSpot hidden fields are useful.
Get expert Salesforce & HubSpot automation tips, straight to your inbox.
MarCloud is a team of certified Pardot, Marketing Cloud, and Salesforce specialists. We help businesses to unlock the potential of marketing automation.
Join 2,000+ professionals who receive actionable insights to boost their automation performance.