So, now you understand the lingo and what the purpose of Contact Builder is, it’s time to dive into creating your first Data Extensions and relationships.
To help, let’s walk through the steps using two different scenarios as examples.
Scenario A: Financial service business working with high-net-worth individuals
Step 1: Create a Data Extension for client information
Go to Data Extensions under Contact Builder
Click ‘Create’ to build a new Data Extension
Name the Data Extension ‘High Net Worth Clients
Set the Data Retention Policy to ensure data is stored securely for compliance purposes.
Define the fields and data type, such as:
Client ID (Primary Key): This is the unique identifier for each client.
First Name
Last Name
Email
Phone Number
Net Worth
Service Start Date
Service Plan Type (Long-term wealth planning, estate management, etc.)
Step 2: Create a related Data Extension for service details
Step 3: Set the relationship between Data Extensions
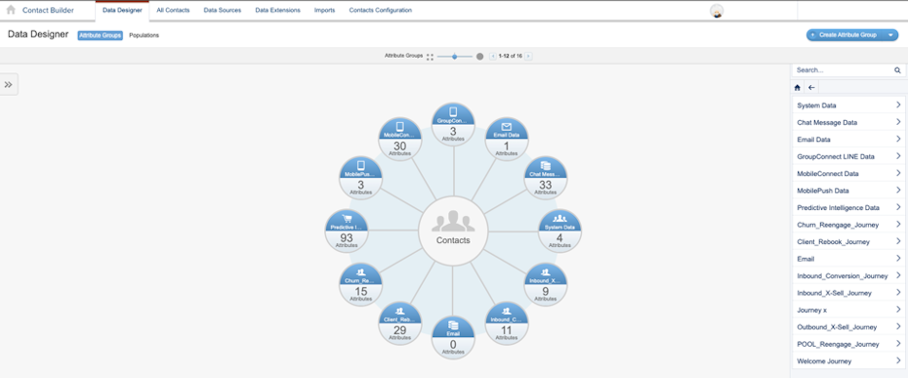
In Contact Builder, navigate to Data Designer
Under Attribute Groups, create a new attribute group called ‘Financial Services’
Click on ‘Link Data Extensions and select the Data Extensions you’ve created - both ‘High Net Worth Clients’ and ‘Service Engagements’.
Set up a One-to-Many relationship between Client ID in ‘High Net Worth Clients’ and Client ID in ‘Service Engagements’. This relationship indicates that one client can have multiple service engagements over time.
Step 4: Create a Data Extension for advisor communications
Create another Data Extension named ‘Advisor Communications’ to track key touchpoints with clients.
Define fields and data types, such as:
Communication ID (Primary Key)
Client ID (Foreign Key to “High Net Worth Clients”)
Advisor Name
Contact Date
Contact Type (Phone, Email, In-person)
Follow-up Action
Set a One-to-Many relationship between Client ID in ‘High Net Worth Clients’ and Client ID in ‘Advisor Communications’
Scenario B: eCommerce jewellery business with frequent and repeat customers
Step 1: Create a Data Extension for customer information
Go to Data Extensions under Contact Builder
Click Create to build a new Data Extension
Name the Data Extension ‘Jewellery Customers’
Define the fields and data types, such as:
Customer ID (Primary Key)
First Name
Last Name
Email
Gender
Birthday
Preferred Jewellery Type (Necklace, Earrings, Rings, etc.)
Last Purchase Date
Step 2: Create a related Data Extension for purchase history
Step 3: Set the relationship between Data Extensions
In Contact Builder, go to Data Designer
Create a new attribute group called ‘eCommerce Jewellery’
Click on ‘Link Data Extensions’ and select both the ‘Jewellery Customers’ and ‘Purchase History’ Data Extensions.
Set up a One-to-Many relationship between Customer ID in ‘Jewellery Customers’ and Customer ID in ‘Purchase History’. This relationship indicates that one customer can make multiple purchases.
Step 4: Create a Data Extension for marketing preferences
Create another Data Extension named ‘Marketing Preferences’ to track the customer’s opt-ins for promotional emails.
Define fields and data types, such as:
Preference ID (Primary Key)
Customer ID (Foreign Key to ‘Jewellery Customers’)
Email Opt-In (Yes/No)
SMS Opt-In (Yes/No)
Preferred Promotion Type (Discounts, New Products, Exclusive Offers)
Set a One-to-One relationship between Customer ID in ‘Jewellery Customers’ and Customer ID in ‘Marketing Preferences’ because each customer has one set of preferences.
Remember to verify your data model
In both of the above scenarios, the customer would need to finish up by:
Reviewing the Data Designer tab to ensure the relationships are correctly set.
Validating that Client ID (Scenario A) and Customer ID (Scenario B) are appropriately linking the related Data Extensions.
With all of the above steps complete, either business would be in a position to start importing data to their Data Extensions and using these for marketing campaigns.
Hopefully, the examples have helped you understand how to get started with your data modelling but if you’re stuck and would like to speak with a certified Marketing Cloud specialist, we’re all ears!
MarCloud has plenty of experience in the platform and with data scientists on our team, we can get you up and running quickly. Send us a message today.

