Salesforce Lead Status can identify exactly how leads move through the sales cycle, from Lead to Opportunity to Closed Customer, by pinpointing their recent engagements.
For the sales team, this means having fast and accurate visibility over which leads to prioritise with their time and conversion efforts and easier reporting on the quality of leads in the system.
Before we take a deep dive into exactly how to set up custom Lead Status, let’s identify the key differences between Leads and Contacts within Salesforce.

Moving Through the Sales Cycle using Salesforce Lead Status:
Leads vs. Contacts in Salesforce
Leads
In a nutshell, Leads are individuals that have demonstrated an interest in our products or services.
Through continued engagement with our brand and campaign assets, these individuals may have been marked as Marketing-Qualified Leads (MQL’s) in Pardot and pushed through to Salesforce when they have been deemed ‘sales-ready’.
Once a sales representative has followed up regarding this opportunity, the lead will be converted into a Contact.
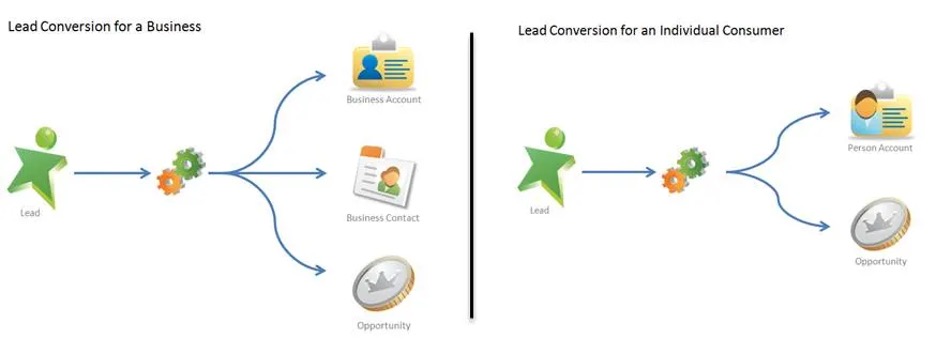 Image source: Trailhead
Contacts
Contacts are, therefore, the individuals who are our established point of communication within a target business.
In order for a Contact to have a direct link to an Opportunity in Salesforce, we must use Contact Roles. These roles specify relevant details regarding the person and make it possible to appoint them as the ‘decision-maker’ for an Opportunity, determining their importance.
What is Lead Status then?
Lead Status is a fundamental part of how we segment our Leads so we can quickly see whether we should follow up with them.
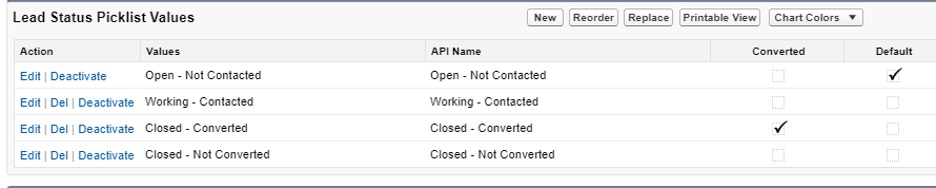
As part of the initial setup, Salesforce may have created the following four picklist values:
- Open – Not Contacted
- Working – Contacted
- Closed – Converted
- Closed – Not Converted
When a Lead is created, it will be assigned the value ‘Open’ as Default. This means that all leads will have the status of ‘Open – Not Contacted’ until activity on the record is populated.
When the Lead moves through the sales cycle, it will change Lead Status Value to reflect the type of engagement it has had with your organisation.
| Value |
Definition |
| Open – Not Contacted |
This is automatically assigned as the default value, meaning that all new leads will be assigned as ‘Open- Not Contacted’. This simply means the Lead is either new and/or has not been contacted by a sales representative yet. |
| Working – Contacted |
There has been sales activity with this lead, it may be either one-way or two-way communication. We recommend adding additional custom values such as ‘Working – Response’ to further identify where the Lead is in the sales cycle if the lead has responded. |
| Closed – Converted |
To some organisations, this may be represented as ‘Opportunity – Won’, meaning the Lead has been converted to a Contact with an Opportunity associated with that Account. However, this could mean that the lead has simply been converted to a Contact through talks of an Opportunity. |
| Closed – Not Converted |
This simply means that the Lead has not been converted to a contact role, this could be due to an Opportunity being lost. |
Like most of Salesforce features, the Lead Status Values can be personalised, renamed or replaced to accurately represent your company’s sales cycle and produce more in-depth reporting as a result.
You may wish to add additional steps or ‘values’ such as ‘Working – Response’, ‘Unqualified’, ‘Nurturing’ etc.
To add new values: head to Object Manager > Lead > select Fields & Relationships > select Lead Status > scroll to Lead Status Picklist Values > New.
Once on the setup page, there is an option next to the value to ‘Edit’, this will allow you to rename and/or mark the value as ‘Converted’ or ‘Default’.
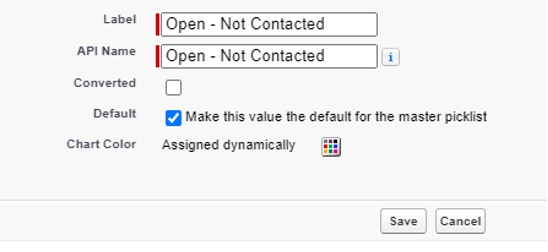
If ‘Converted’ is ticked, then the value chosen will allow the user to convert the Lead with this Lead Status Value – without this option converting the lead is not possible.
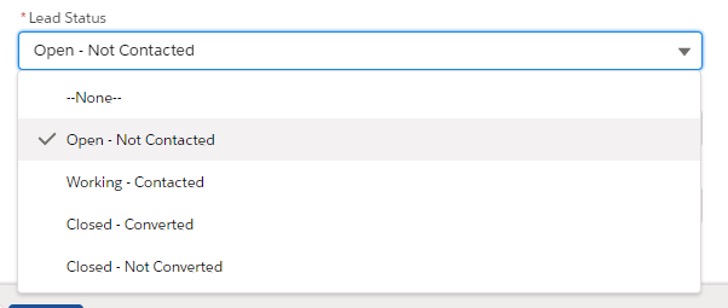
All active values will display as a dropdown on the Lead’s ‘Record Detail’ page, this can be manually changed if needed. However, it is also possible to automate the process.
When creating new values, you may choose to deactivate certain values you do not wish to use by clicking ‘Deactivate’ next to the value in question, this will move the value into the section below labelled ‘Inactive Values’ as opposed to deleting them entirely.
When you use Record Types you need to set up ‘Lead Processes’ too that support the lead process. This allows you to set up different lead statuses depending on the record type.
Path
Now, we think this is important information and should stand out… and Salesforce agrees!
As part of the interface in Salesforce Lightning, we are able to create a Lead Status bar or ‘Path’, which displays at the top of the Lead’s page (see screenshot below). This visual sales process allows the stage of the lead/contact to be quickly identified.

Why should we enable this? Well, it not only unifies the selling structure but reduces any delays in qualifying leads and closing deals! Sales reps are able to focus on how to maximise their sales and sales managers are able to view sales rep’s progress, win-win for everyone!
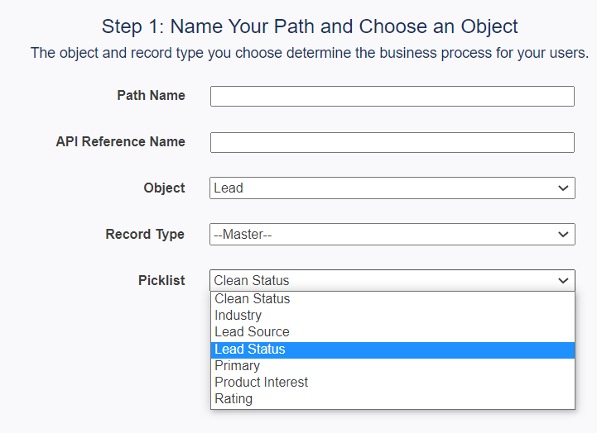
To set up a new path, head to Setup > Path Settings > Enable > New Path.
In order to set up the path for Lead Status, ensure you select ‘Lead’ under Object and ‘Lead Status’ as the picklist value.
For each stage, you are able to choose up to five fields that are specific to that Path. This will be completely dictated by what information you want to view from that Path.
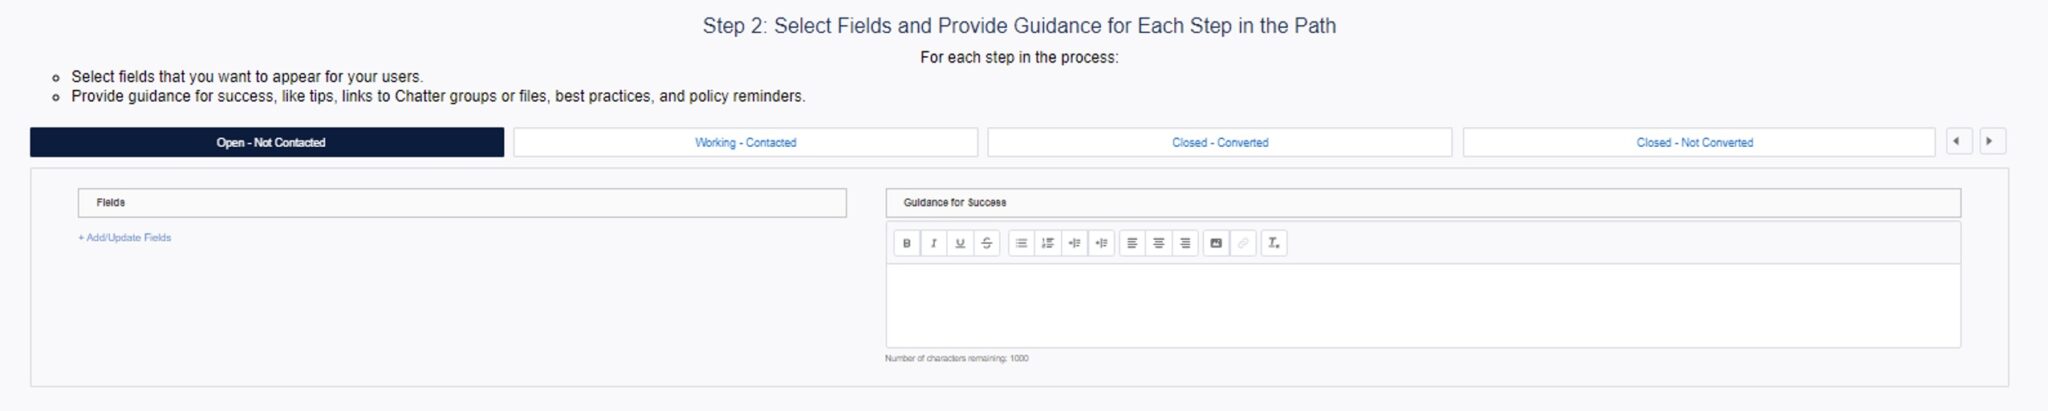
These key fields then show underneath the Path depending on which stage they are at, highlighting these values without the need to scroll to find or opening 1000 tabs!
As you can see, we are also able to write any ‘guidance for success’ in the text box to the right hand side. Both of these are shown as examples in the screenshot below:
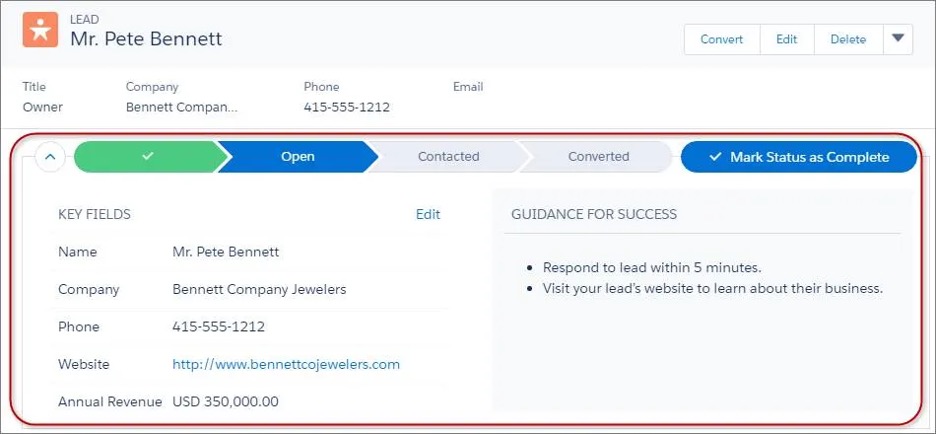
Image source: Trailhead
Note: To quickly move the Lead to the next status, simply click on the step desired and click Mark Current Status.
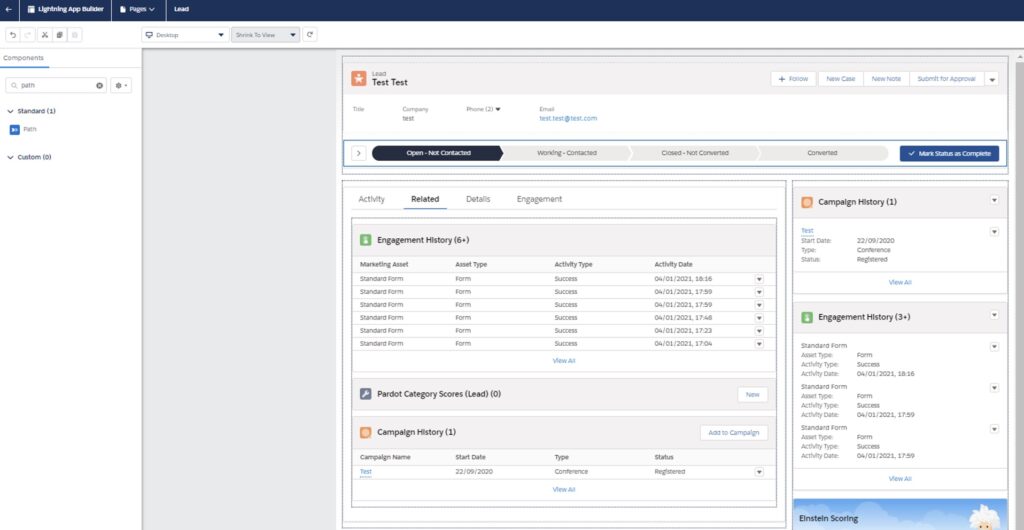
Once activated, remember to add the Path onto the Lead page using the Lightning App Builder by dragging the component across!
Note: The Path bar is automatically set to the colour scheme of your org, you can change this by heading to Themes & Branding.
Kanban View
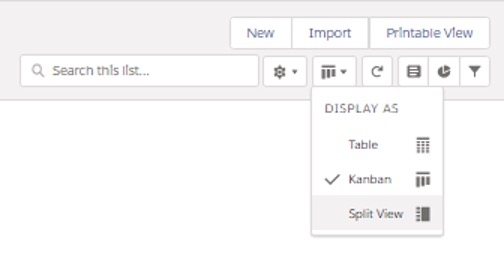
Now that we have a fantastic visual of Lead Status, why stop there? Kanban view allows us to easily sort, filter and move most objects, including Leads, Tasks, Opportunities etc. to form a list-view.

Simply go to the object you would like to view > Display as > Kanban.
From this list, we can move objects from one column to another by simply dragging it across! Not only this, we are able to edit and make any changes to this record from this list as well as delete or change the owner.
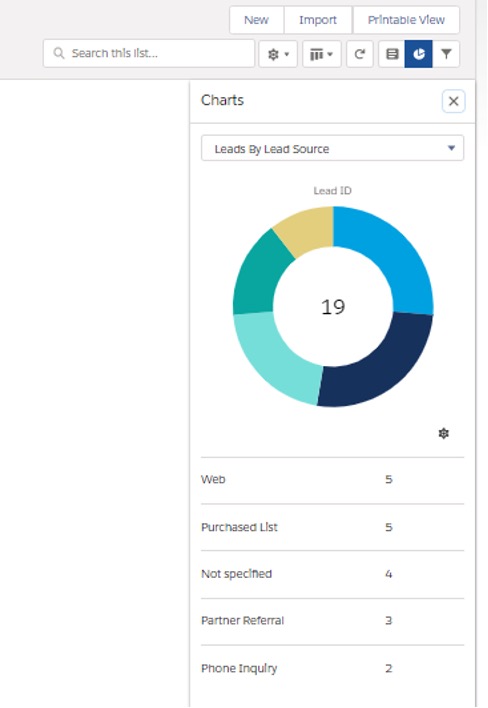
Plus, we are able to summarise this data into a chart format, displaying by the data you would most like to see:
I hope this post has given you a more in-depth understanding of Lead Status and converting Leads to Contacts, so that you can utilise Salesforce features to grow your pipeline and work effectively to increase sales. If you have any questions on how to maximise your sales potential, please contact the team here at MarCloud Consulting.