Using Dynamic Content in Salesforce Marketing Cloud
You may have noticed the ‘Dynamic Content’ Block in Salesforce Marketing Cloud Engagement before, yet steered clear of using it, fearing it could be too complicated to set up correctly.


4 mins
You may have noticed the ‘Dynamic Content’ Block in Salesforce Marketing Cloud Engagement before, yet steered clear of using it, fearing it could be too complicated to set up correctly.
4 mins
You may have noticed the ‘Dynamic Content’ Block in Salesforce Marketing Cloud Engagement before, yet steered clear of using it, fearing it could be too complicated to set up correctly. If that’s the case, this guide is for you because we’re going to run through the reasons to use dynamic content for email marketing, and provide the basic steps to getting set up.
For the record, there are a couple of ways to insert dynamic content in Marketing Cloud emails and the ‘Dynamic Content’ block is the easiest for fairly simple use cases. There’s also the option to use AMPscript but this involves writing some HTML code and can be more tricky to tackle for non-coders.
In this post, we’ll stick to explaining the standard ‘Dynamic Content’ block.
The Dynamic Content feature in Salesforce Marketing Cloud is not only the best way to ensure subscribers receive tailored content, it’s a huge time saver for marketers too.
It allows us to switch the content in our email content based on the profile attributes of recipients.
For example, a university might have a list of potential students interested in enrolling but each is interested in a different course. With the Dynamic Content block, it’s possible to swap the course or content featured in a single email based on the receiver’s preferred area of study.
First and foremost, this ensures that only the most relevant information is sent to subscribers, which is likely to increase engagement and conversion rates.
The added benefit though is that SFMC users don’t need to spend time creating multiple segmented lists and dozens of versions of the same email. With Dynamic Content blocks, the processes for tailoring and personalising emails becomes much simpler and more efficient.
Naturally, the first step in your dynamic content journey is to plan exactly which types of content you want to be dynamic, and based on which criteria.
Before you jump into Salesforce Marketing Cloud and begin building your email, document your plan so the whole team understands the logic and you can refer back to it in the future. Consider when dynamic content is most necessary and for which segments of your audience.
Documenting a plan is actually really useful for clarifying things in your own mind too! Dynamic content variations can get complex so it’s important to have a top-level visual.
In order to display a certain piece of content for a recipient, we need to create rules using the data points we have about them. There are three places in Marketing Cloud we can draw these data points from:
If you’re using a simple subscriber list, rather than Data Extensions, this will likely be your best option.
Many SFMC users are storing data in Data Extensions though, given Journey Builder requires us to use these. In this case, you’ll pull your attributes from Data Extensions.
Tip: If you’re tailoring content based on the attributes in a specific Data Extension, the email must also be sent to this Data Extension, or one with the same fields and the exact same names as those used in the dynamic content rules.
The last option, an imported .csv file, may apply when you have a one-time list you need to contact. For example, event attendees who should only receive a transactional email and are not considered subscribers to marketing emails.
The assets you want to use for dynamic content should be uploaded to Content Builder before you begin creating your email, so you can select them easily during the setup process and test that all rules are working as expected.
Uploading content to the Content Builder is straightforward, with drag-and-drop functionality that allows you to select documents such as images from your computer or an external URL.
Upload using the following steps:
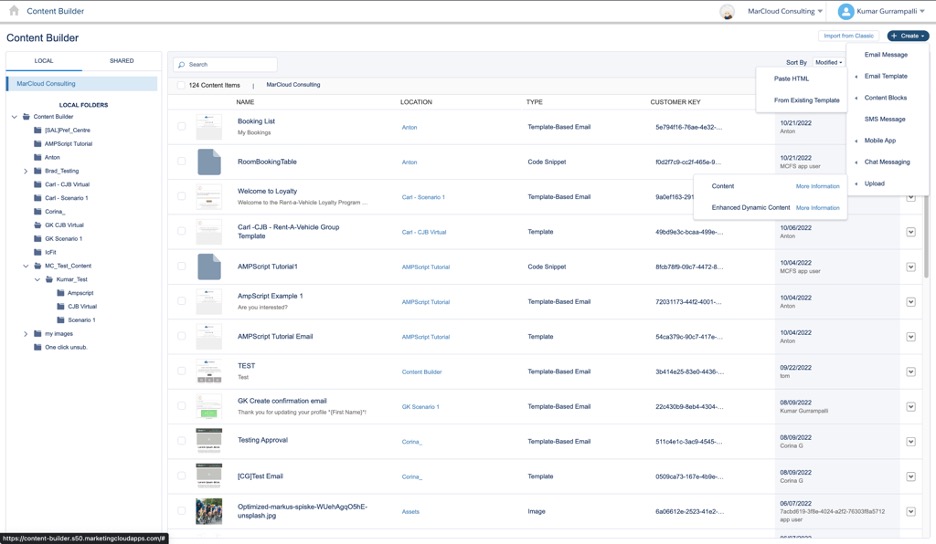
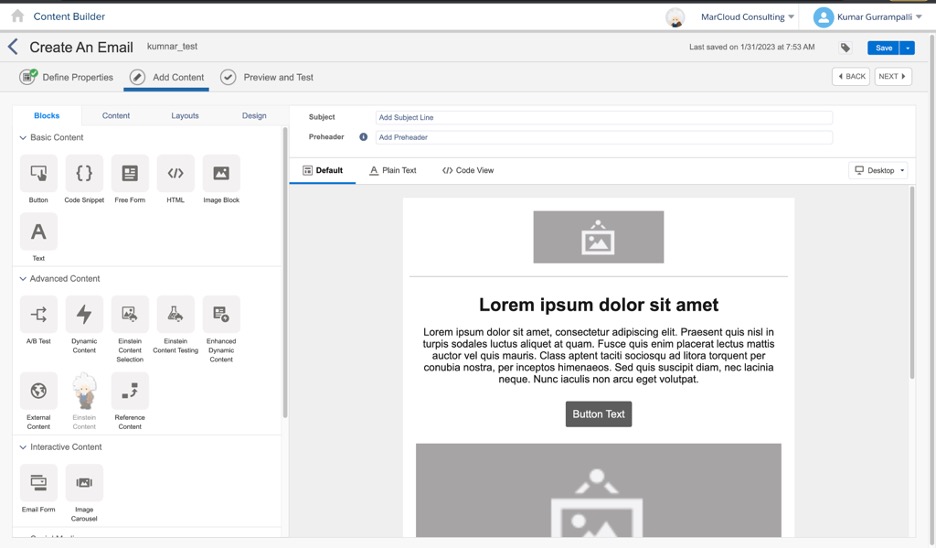
Whether you want to create an email template that can be used for multiple messages or a one-time email message, you can do so within Content Builder using ‘Blocks’.
Basic Blocks include things like ‘Text’, ‘Image Block’, ‘Button’, and so on. Advanced Content is where you’ll find the more sophisticated Blocks, including ‘Dynamic Content’ and ‘Enhanced Dynamic Content’.
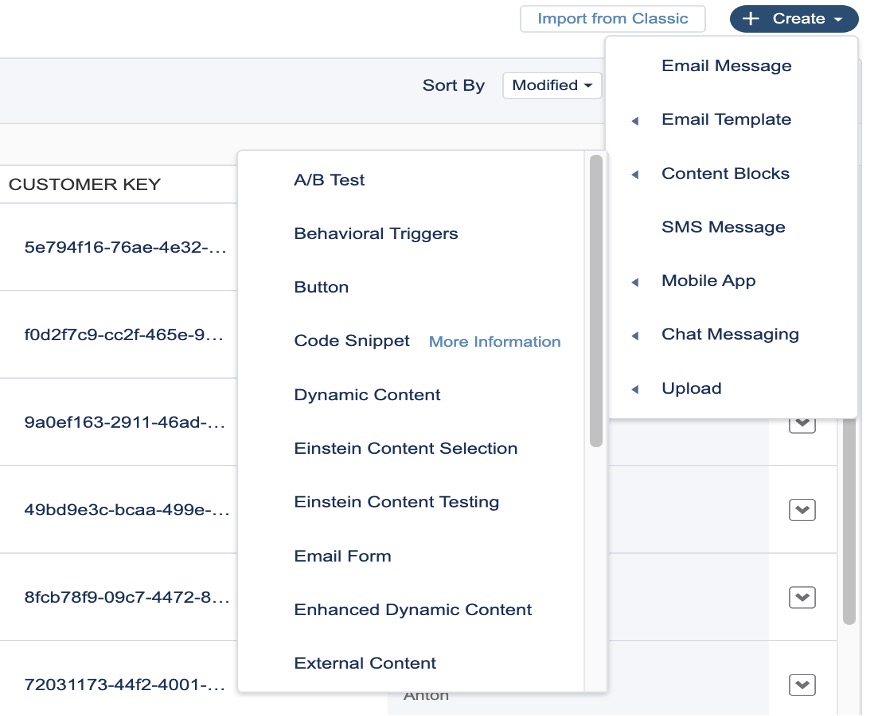
Dynamic Content versus Enhanced Dynamic Content
Dynamic Content requires us to input the rules and upload the assets we want to show within an email directly into the Salesforce Marketing Cloud platform. In some cases, this can mean adding rows and rows of rules i.e. if a university has 50 courses and they want to show the most relevant course to a potential student based on their area of interest.
Enhanced Dynamic Content makes it easier to manage more complex dynamic content requirements by allowing us to specify the rules and assets to display within a single delimited file, then uploading this file to Marketing Cloud.
For this guide, we’ll stick to standard Dynamic Content Blocks but reach out if you’d like support with using more advanced dynamic content.
Start by setting up the main elements of your email, such as the header and footer, and any static content.
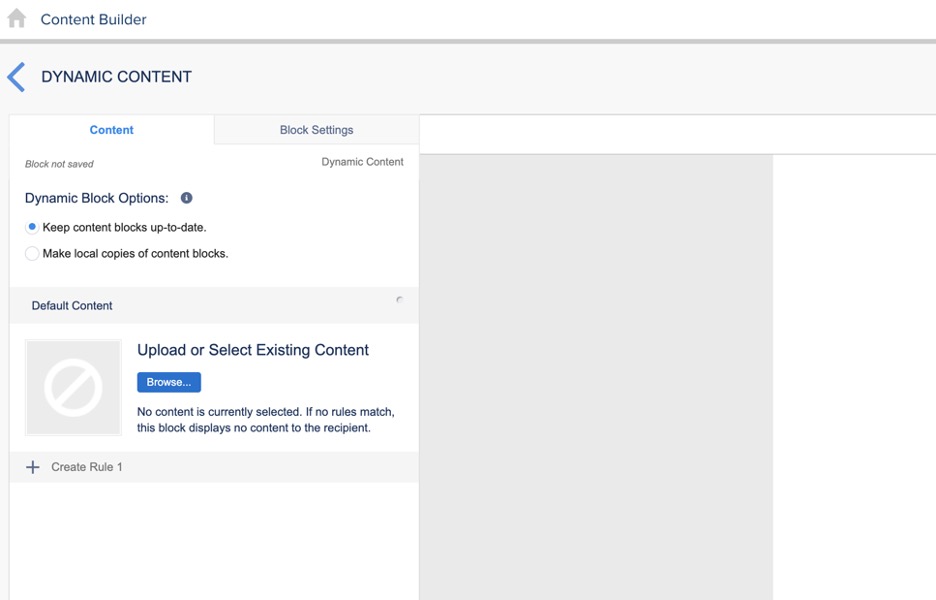
Next, add Dynamic Content to your email message by dragging and dropping the ‘Dynamic Content’ Block onto the canvas where you’d like the dynamic content to show. Then follow these steps:
Tip: Keep your account nicely organised with folders and consistent naming conventions! This will make finding and managing assets much faster.

9. Simply drag and drop the attribute onto the canvas. For example, a university could use the attribute ‘Course interest’.
10. Use the dropdown menu to select your rule condition i.e. ‘is equal to’, ‘begins with’.
11. Enter a value in the empty field i.e. the university may use ‘Bachelor of Arts’.
Tip: Remember to check for typos or any small differences in your source values versus what you enter for your rule value, especially if you’re using ‘is equal to’. If the Data Extension uses ‘Bachelor of Art’ but you write ‘Bachelor of Arts’ for the rule, it will not work.
12. Repeat the process for additional attributes if needed.
13. Click ‘Save’.
Now, you’ll see Rule 1 is set up within the Dynamic Content Block and you have the options to edit, delete or duplicate. If you’re using the same attributes for multiple rules and simply changing the value i.e. changing ‘Bachelor of Arts’ for ‘Master in Mathematics’ then duplicating is a faster way to go about configuring all your rules.
Once you’ve entered all rules, you can click on each to check that the correct assets show.
Side note: To change email text based on attributes from a profile or Data Extension, use AMPscript to add personalisation by inserting the attribute name surrounded by double percentage symbols, like so:
%%course_interest%%
At this stage, we want to double-check that our dynamic content rules are working as expected.
Our advice for getting started with Dynamic Content in Salesforce Marketing Cloud is to start small and scale up. Consider tailoring your email content with just two or three variations, to begin with, and once you feel comfortable, expand to include more advanced logic - at which point you might want to look into ‘Enhanced Dynamic Content’ too!
The MarCloud team is on-hand to help with any questions or troubles you may have, you can see our support packages for Marketing Cloud here.
Kumar’s working day involves end-to-end Salesforce Marketing Cloud Engagement implementations & API integrations. Typical tasks include requirement gathering, solution design, testing, implementation, and overseeing the development. He’s quality-focused and always gives best-in-class solutions to clients.
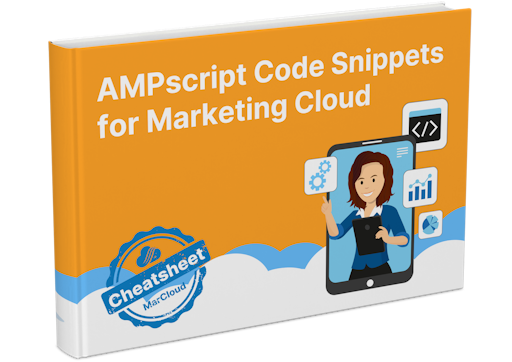
More by Kumar GurrampalliOur genius MarCloud developers have combined the most commonly requested AMPscript code snippets into one document. Simply download, then copy and paste into your own account for fast solutions. Download the cheatsheet today and take your marketing to the next level.
Download nowIt’s easy to assume your HubSpot lead scoring is functioning as it should, but if sales reps are pushing back on lead quality, or you’re struggling to prove marketing influence on pipeline, your scoring isn’t accurately surfacing leads worth pursuing.
Tom Ryan
7 mins
There’s a trend in the conversations we’re having with marketing leaders these days. Teams that have been using Salesforce Account Engagement (Pardot) or Marketing Cloud Engagement for years are looking at alternatives, and this typically leads them to two options. Either they stay within the Salesforce ecosystem by moving to Marketing Cloud Next (one of Salesforce’s ‘on core’ marketing platforms), or they switch to HubSpot.
Tom Ryan
8 mins
If you've been using Marketing Cloud Account Engagement (Pardot) for a few years, you'll know the product roadmap has stayed very, very still. Feature requests from years ago haven't arrived, leaving workarounds as permanent fixtures. Many marketers feel as though the platform they invested in isn't keeping up with what teams need it to do.
Tom Ryan
5 mins

MarCloud is a team of certified Pardot, Marketing Cloud, and Salesforce specialists. We help businesses to unlock the potential of marketing automation. Join 2,000+ professionals who receive actionable insights to boost their automation performance.
Sign up to the newsletterOur genius MarCloud developers have combined the most commonly requested AMPscript code snippets into one document.
Download now